
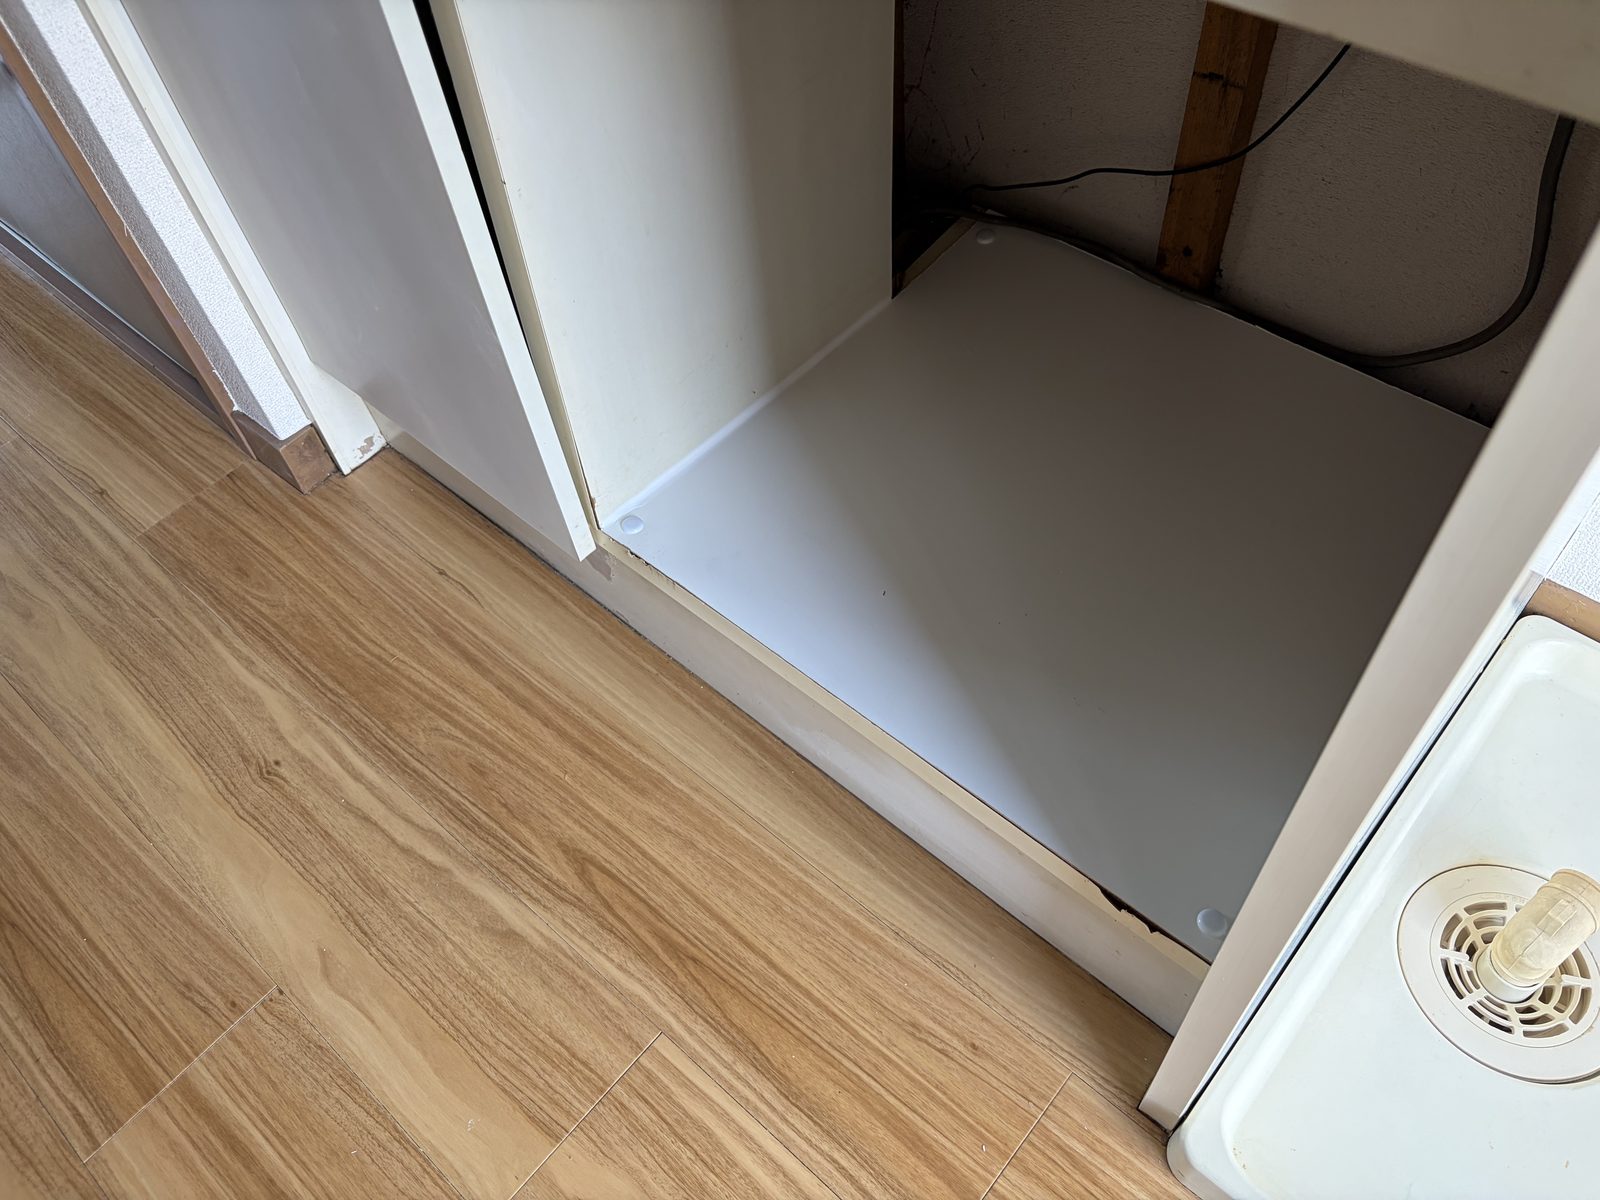
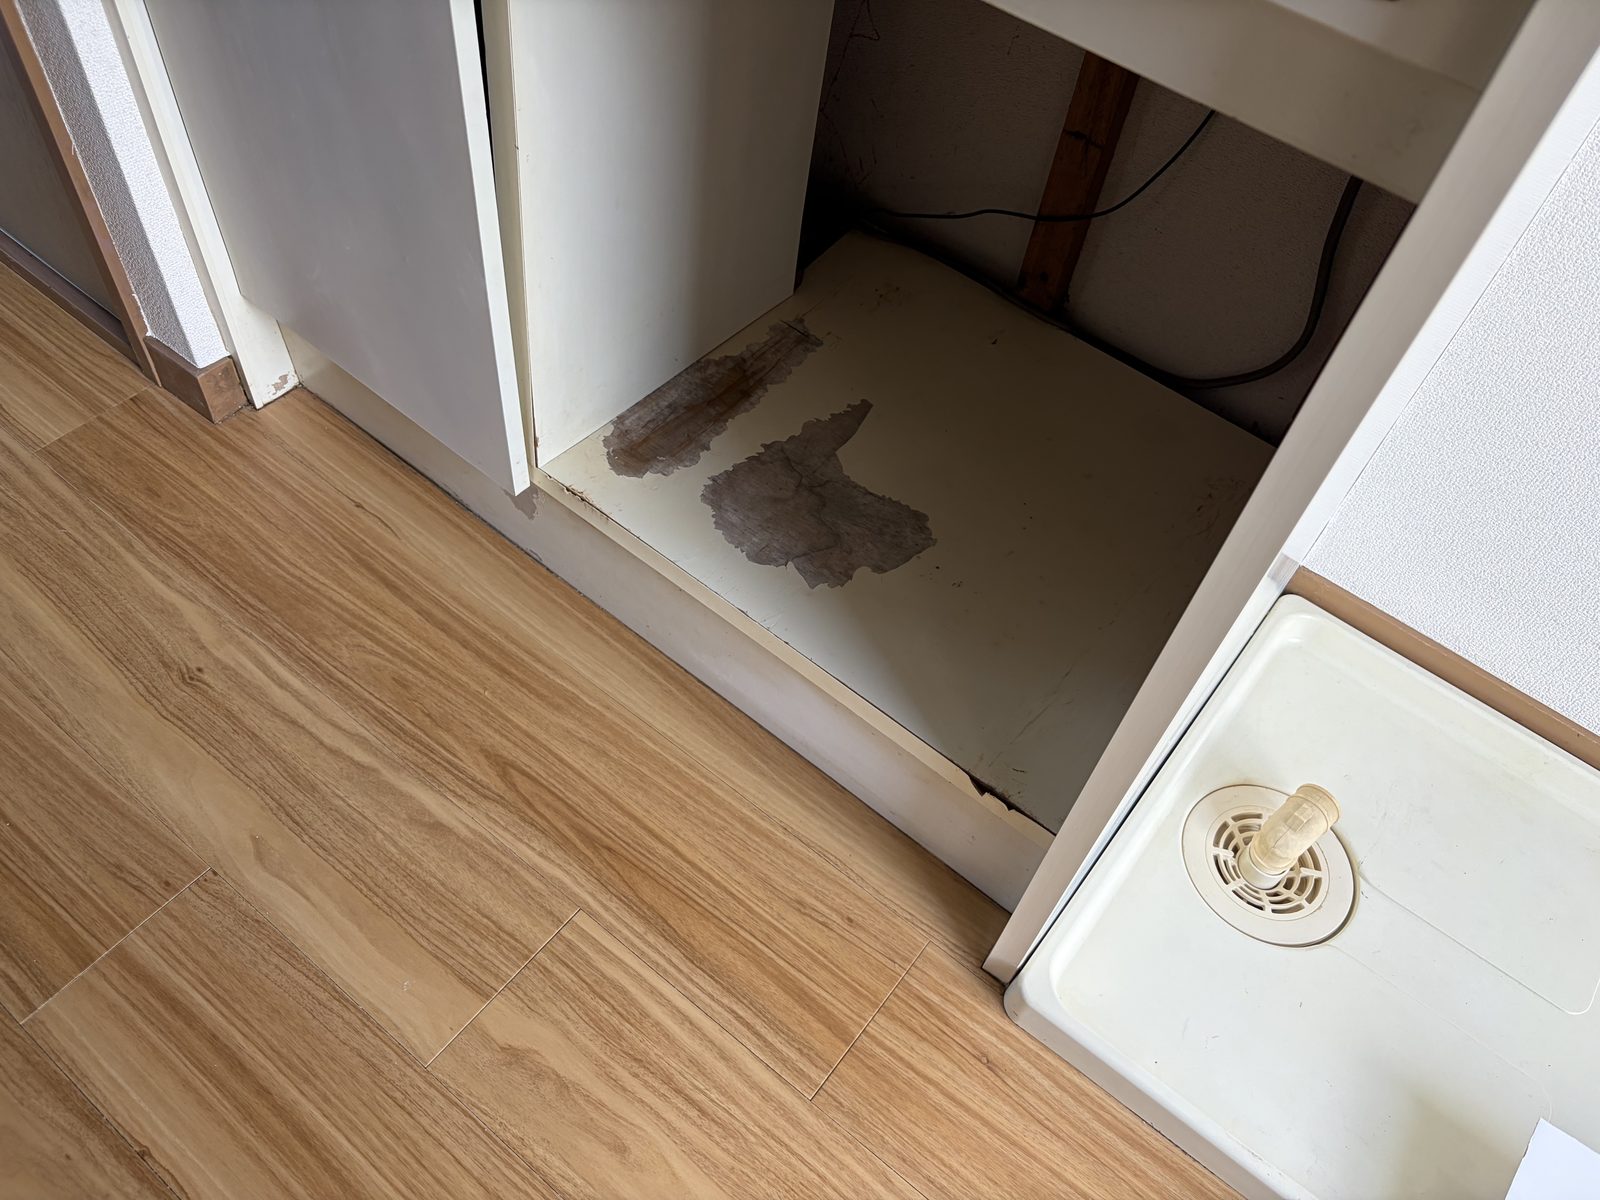
First: does it need fixing at all?
We start with that question.
This is not a hidden spot. The next tenant will look straight at it when they set their own fridge down. On the day someone moves into a new home, the previous occupant’s mark is right there. That alone changes the impression.
We sent the managing agent a photo and asked to add the work. Having the photo on the spot makes the conversation short, so we take it the moment we notice something.
Three ways to fix it, and why we chose one
| Method | Cost | Time | Result |
|---|---|---|---|
| Cleaning | Almost nothing | 30 min | It did not come off |
| Replace the whole board | High | 1–2 days | Clean |
| Lay a new board over it | A few thousand yen | Half a day | Clean |
Replacing the board means taking off the surrounding joinery first. Under a counter, things are usually fixed from places you cannot see, and getting them off and back on eats half a day by itself. For this much area, that is not worth doing.
We laid a new board over the old one instead.
What we used
5 mm melamine-faced plywood. The face is a white resin layer: water resistant, and it can be wiped down. At 5 mm, laying it over leaves almost no step.
A thicker board would raise the fridge and start interfering with the socket and the earth lead. Being thin is what makes it work here.
How it went
1. Measure and cut
Measure the depth and width, then cut it slightly under. Cut it exact and it will not go in. We leave 3–5 mm in total across the width.
2. Wipe the substrate
Get the dust off the existing board. Skip this and the new board lifts later.
3. Double-sided tape first, then adhesive
We lay the double-sided tape down first and run the adhesive between the strips. The tape holds it; the adhesive bonds it.
Adhesive takes time to cure. If the board shifts during that time, it sets crooked. With the tape down first, the board locks into position the moment it lands, and all that is left is waiting for the adhesive. No weights, no overnight — that is what keeps it to half a day.
We used a kitchen-panel adhesive, the kind that grips vinyl and resin surfaces. Ordinary wood glue does nothing on a melamine face.
4. Set it down and press
In at the back, drop the front, press the whole surface down by hand.
5. Silicone along both sides
A thin bead of silicone down the left and right edges.
That is not only for looks. If water gets into the gap between board and wall, the same thing happens again underneath the board we just laid. We close the way in.
What it came to
We did not buy anything for this job. Everything came out of stock.
Materials  5 mm melamine ply (one sheet)      ~JPY 8,000   from stock
           Kitchen-panel adhesive             ~JPY 800     from stock
           Double-sided tape and silicone     ~JPY 1,000   from stock
Time       Measuring through to finishing     Half a day

Invoiced                                      ~JPY 12,000
You cannot buy half a sheet of melamine ply, so it comes in whole sheets. That sheet is expensive right now — the same price rises we wrote about last time. It used to cost considerably less.
Small things that were not in the quote come up constantly. That is why we hold stock.
Holding stock ties up money, and we know it. But a trip to the supplier turns a half-day job into a full day. And once a job is quoted at a full day, the client sometimes drops the idea altogether. Whether the material is already in the van decides whether it gets fixed that day or not at all.
What we invoiced covers the materials plus travel, overheads and half a day of labour. The cost of the materials is not the price of the job.
Replacing the board outright would have meant taking the joinery off and putting it back, which does not fit inside that figure.
What we take from this
Internally we call this kind of job “small works.” The name is casual; the handling is not.
On restoration jobs, small things that were not in the quote always turn up. Under the fridge, under the washing machine, behind furniture. While the things are there, nobody can see it.
Three things matter, we think.
- Photograph it the moment you notice — faster than explaining later
- Offer more than one fix, with cost and time side by side — the client chooses
- Be willing to say “leave it” — if it will never be seen, sometimes that is the right answer
This one was somewhere the next tenant would certainly look, so we recommended fixing it. For a small mark that will sit behind furniture forever, we would propose spending nothing.
Even small jobs are worth photographing. It makes the next conversation shorter. This post is one of those photographs.